
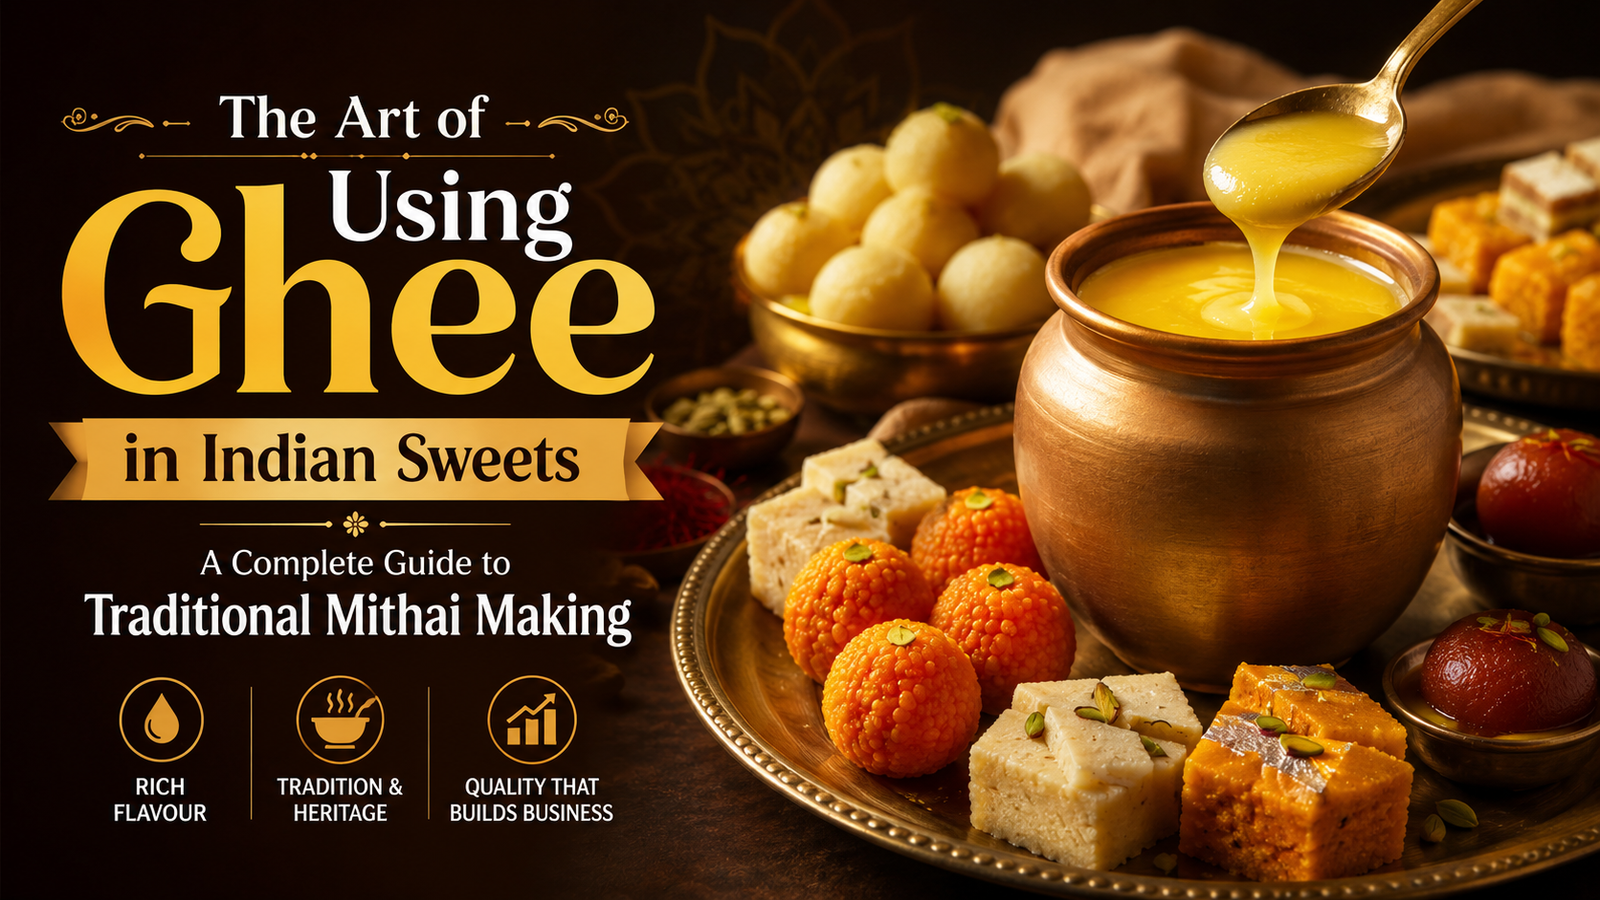
Close your eyes and imagine: The aroma of cardamom-infused ghee sizzling in a heavy-bottomed kadhai, the golden shimmer of freshly made ladoos lined up on a silver platter, and that first bite of warm besan halwa that melts in your mouth. This is the magic of ghee in Indian sweets – an ancient art that transforms simple ingredients into divine experiences.
For thousands of years, ghee has been the soul of Indian desserts. It’s not just an ingredient; it’s what gives our traditional sweets their signature aroma, luxurious texture, and that authentic taste that no substitute can replicate. From the humble pinni prepared in Punjab’s winter months to the elaborate mohanthal served at Gujarati weddings, pure ghee is the golden thread that connects all traditional sweets across India.
But using ghee in sweet cooking is an art form that requires understanding – the right amount, proper technique, ideal temperature, and perfect timing. Too little, and your sweets lack richness; too much, and they become greasy. Get it right, and you create magic.
In this comprehensive guide, we’ll unlock the secrets of ghee sweets mastery. You’ll learn why ghee is irreplaceable in traditional mithai, discover 5 authentic heritage recipes with step-by-step instructions, and understand the techniques that separate amateur attempts from professional-quality results.
At Milkaza, we believe that authentic Indian desserts deserve authentic ingredients. That’s why our pure cow ghee is crafted to deliver the taste and aroma that brings traditional recipes to life.
Ready to master the golden art of Indian sweet-making? Let’s begin!
Why Ghee is the Soul of Indian Sweets: Beyond Just Flavor
Understanding why ghee is non-negotiable in authentic traditional sweets helps you appreciate its role and use it correctly.
🏺 Historical & Cultural Significance
Ghee has been central to Indian cuisine for over 5,000 years. Ancient texts like the Rig Veda mention ghee as “liquid gold” offered to gods. In Hindu tradition, no religious ceremony or celebration is complete without sweets made with pure ghee.
According to the National Institute of Indian Medical Heritage, ghee was considered the most sattvic (pure) cooking medium in Ayurvedic tradition, making it the natural choice for prasad and festive sweets.
👃 Aromatic Superiority
Pure ghee has a distinctive nutty, caramelized aroma that develops during the clarification process. When heated, this aroma intensifies, creating the characteristic fragrance of Indian desserts.
Butter vs Ghee:
- Butter: Milky, subtle aroma
- Ghee: Deep, nutty, caramelized fragrance
- Oil: Neutral or sometimes off-putting
This is why no substitute can replicate the authentic taste of ghee sweets.
🔬 Functional Properties
Ghee isn’t just about taste – it serves critical technical functions:
1. High Smoke Point:
- Ghee: 485°F (252°C)
- Butter: 350°F (177°C)
- Advantage: Can be heated to high temperatures without burning, crucial for roasting flours and nuts
2. Binding Agent:
- Fat molecules in ghee coat flour particles
- Creates cohesion in ladoos and barfis
- Prevents crumbling and maintains shape
3. Moisture Retention:
- Ghee forms a protective layer around ingredients
- Keeps halwas moist without being soggy
- Extends shelf life naturally
4. Texture Enhancement:
- Creates the characteristic glossy finish
- Produces smooth, melt-in-mouth consistency
- Prevents crystallization in sugar-based sweets
5. Flavor Carrier:
- Fat-soluble flavor compounds in cardamom, saffron, and nutmeg dissolve in ghee
- Distributes flavors evenly throughout the sweet
- Intensifies taste perception
💊 Nutritional & Digestive Benefits
According to research in the Journal of Food Science and Technology, ghee contains:
- Butyric acid: Supports gut health
- Fat-soluble vitamins: A, D, E, K
- Conjugated Linoleic Acid (CLA): Potential health benefits
- No lactose or casein: Easier digestion than butter
While sweets should be consumed in moderation, using pure ghee makes them more wholesome than versions made with hydrogenated oils or margarine.
🎯 Why Alternatives Fall Short
Oil:
- ❌ No aroma
- ❌ Can make sweets greasy
- ❌ Doesn’t bind properly
- ❌ Inferior taste
Butter:
- ❌ Burns at high temperatures
- ❌ Contains water (15-20%) that affects texture
- ❌ Different flavor profile
- ❌ Shorter shelf life
Margarine/Vanaspati:
- ❌ Contains trans fats (unhealthy)
- ❌ Chemical taste
- ❌ Ruins authentic flavor
- ❌ Not acceptable in traditional recipes
For authentic Indian desserts, pure cow ghee from trusted sources like Milkaza is the only choice.
The Science Behind Ghee in Sweet Making
Understanding the chemistry helps you use ghee more effectively.
🔥 Temperature Matters
Different traditional sweets require different ghee temperatures:
Low Heat (150-180°F):
- Use for: Binding ladoos, finishing barfis
- Why: Maintains structure without melting
- Examples: Besan ladoo final mixing, coconut ladoo
Medium Heat (180-220°F):
- Use for: Roasting flours, cooking halwas
- Why: Develops nutty flavor without burning
- Examples: Atta halwa, moong dal halwa
High Heat (220-250°F):
- Use for: Initial roasting of nuts, tempering
- Why: Creates deep caramelization
- Examples: Cashew roasting for kaju katli, beginning of sooji halwa
⚖️ The Golden Ratio
Different sweets require different ghee-to-main-ingredient ratios:
| Sweet Type | Ghee Ratio | Example |
|---|---|---|
| Ladoos | 1:2 to 1:3 | 1 cup ghee to 2-3 cups flour |
| Halwas | 1:1 to 1:2 | 1 cup ghee to 1-2 cups main ingredient |
| Barfis | 1:4 to 1:5 | 1 cup ghee to 4-5 cups nuts/milk solids |
| Milk-based sweets | 2-4 tbsp per liter milk | Kheer, rabri, basundi |
Pro Tip: Traditional recipes often use more ghee than needed. For home cooking, you can reduce by 10-15% without compromising quality.
💧 Ghee and Sugar Syrup Chemistry
In sweets like jalebi and gulab jamun where ghee meets sugar syrup:
- Ghee creates barrier: Prevents oversaturation
- Controls absorption: Maintains texture
- Adds richness: Without making syrup cloudy
This is why these sweets are traditionally fried in ghee, not oil.
Types of Ghee for Different Sweets
Not all ghee is the same. Choosing the right type matters.
🐄 Cow Ghee vs Buffalo Ghee
Cow Ghee (Recommended):
- Lighter, more aromatic
- Better for delicate sweets
- Golden-yellow color
- Easier to digest
- Best for: Ladoos, barfis, milk-based sweets
- Get it: Milkaza Pure Cow Ghee
Buffalo Ghee:
- Richer, heavier
- White color
- Preferred in certain regions
- Best for: Rich halwas, winter sweets
- Get it: Milkaza Desi Ghee
Mixed Ghee:
- Balanced properties
- Cost-effective
- Best for: Everyday sweets
Learn more: Cow Ghee vs Desi Ghee: What’s the Difference?
🏺 Traditional vs Modern Ghee
Bilona (Traditional Method):
- Made from cultured butter
- Superior aroma
- More expensive
- Best for: Special occasion sweets, prasad
- Premium option from Milkaza
Modern Method:
- Made from cream
- Consistent quality
- More affordable
- Best for: Daily cooking, large quantities
🌿 A2 Ghee
Made from indigenous cow breeds:
- Potentially easier to digest
- Premium quality
- Best for: Special sweets, health-conscious cooking
Essential Ghee Techniques for Perfect Sweets
Master these techniques before starting any recipe.
🔥 The Roasting Technique (Bhunna)
This is THE foundational skill for most ghee sweets:
Step-by-Step:
- Choose the right vessel: Heavy-bottomed kadhai or pan (even heat distribution)
- Heat ghee properly:
- Add measured ghee
- Heat on medium until it liquefies completely
- No smoking (too hot) or shimmer (just right)
- Add flour/nuts:
- Add main ingredient (besan, atta, sooji, etc.)
- Critical: Stir immediately and continuously
- The stirring pattern:
- Use a flat wooden spatula or heavy spoon
- Stir in figure-eight pattern
- Scrape from bottom and sides constantly
- Never stop stirring until done
- Monitor color change:
- Besan: From pale yellow to golden brown (15-20 minutes)
- Atta: From cream to light brown (10-15 minutes)
- Sooji: From white to light golden (8-10 minutes)
- The aroma test:
- Raw smell = not done
- Nutty, toasted aroma = perfect
- Burnt smell = ruined (start over)
- Remove from heat:
- Take off heat slightly before desired color
- Residual heat will continue cooking
Common Mistake: Adding sugar or liquids while flour is too hot causes spattering and uneven mixing.
🥜 The Nut Roasting Technique
For cashews, almonds in barfis:
- Use generous ghee: Nuts should be submerged
- Low-medium heat: Prevents burning outside while raw inside
- Constant stirring: Uneven roasting ruins texture
- Golden, not brown: Remove when light golden (5-7 minutes)
- Drain immediately: Excess ghee can be reused
🌀 The Binding Technique
For ladoos and barfis:
- Cool slightly: Let roasted mixture cool to warm (not hot, not cold)
- Add ghee gradually: Don’t dump all at once
- Mix with hands: Warm hands help ghee coat evenly
- Check consistency: Should hold shape when pressed but not be greasy
- Shape immediately: Mixture sets as it cools
💧 The Moisture Balance
Ghee helps manage moisture in halwas:
- Start high: Use more ghee initially for roasting
- Add gradually: As cooking progresses, add ghee in small amounts
- Final coating: Last tablespoon gives glossy finish
- Never compensate with water: Use ghee or milk to adjust consistency
Recipe 1: Classic Besan Ladoo (Gram Flour Balls) 🟡
The most iconic Indian sweet – pure comfort in every bite!
⏱️ Time:
- Prep: 10 minutes
- Roasting: 20 minutes
- Shaping: 15 minutes
- Total: 45 minutes
- Makes: 18-20 ladoos
📊 Nutritional Information (per ladoo):
- Calories: 156 kcal
- Protein: 3.2g
- Carbohydrates: 18.5g
- Fat: 8.2g
- Fiber: 2.1g
🛒 Ingredients:
Main Ingredients:
- 2 cups (240g) besan (gram flour/chickpea flour)
- ¾ cup (180ml) Milkaza Pure Cow Ghee
- 1 cup (200g) powdered sugar (adjust to taste)
- ½ teaspoon cardamom powder (elaichi)
Optional Add-ins:
- 2 tablespoons cashew pieces, roasted
- 2 tablespoons almond slivers, roasted
- 2 tablespoons raisins
- ¼ teaspoon nutmeg powder
- Few saffron strands
For Garnish:
- Cashew halves
- Silver leaf (varak) – optional
👨🍳 Step-by-Step Instructions:
Step 1: Sift the Besan
- Why this matters: Removes lumps, ensures even roasting
- Pass besan through a fine sieve twice
- Any lumps will remain hard in final ladoos
Step 2: Heat the Ghee
- Take heavy-bottomed kadhai or wide pan
- Add ¾ cup pure ghee
- Heat on medium until fully liquefied
- Ghee should shimmer but not smoke
Step 3: The Critical Roasting (Bhunna)
- Add sifted besan to hot ghee
- Immediately start stirring – this is crucial!
- Use a flat wooden spatula or steel karchi
- Stir continuously in figure-eight pattern
- Scrape bottom and sides constantly
- Timeline: 15-20 minutes total
Roasting Color Stages:
- 0-5 min: Pale yellow, raw smell
- 5-10 min: Starts darkening, smell changes
- 10-15 min: Medium golden, nutty aroma emerges
- 15-20 min: Rich golden brown, deep nutty aroma ✓ DONE
The Doneness Tests:
- Color: Rich golden brown (like peanut butter)
- Aroma: Deep nutty smell fills your kitchen
- Texture: Besan separates from ghee, looks grainy
- Taste: Take a small pinch (careful, hot!), should taste roasted, not raw
Step 4: Add Flavorings
- Remove from heat (besan continues cooking from residual heat)
- Add cardamom powder
- Add nutmeg if using
- Mix well
- Let cool for 10-15 minutes (should be warm to touch, not hot)
Step 5: Add Sugar
- Temperature check: Mixture should be warm (NOT hot – sugar will melt and make ladoos greasy)
- Add powdered sugar
- Mix thoroughly with hands (best method) or spatula
- Break any lumps
Step 6: Add Nuts & Check Binding
- Add roasted cashews, almonds, raisins
- Take a small portion and press
- Perfect consistency: Holds shape without being too tight or crumbly
- Too dry? Add 1-2 tablespoons more melted ghee
- Too loose? Add 2-3 tablespoons more besan-sugar mix
Step 7: Shape the Ladoos
- Best method: Grease palms lightly with ghee
- Take golf ball-sized portion (about 3 tablespoons)
- Roll between palms with medium pressure
- Technique: Use circular motion, applying equal pressure
- Shape should be smooth sphere with no cracks
Step 8: Garnish & Store
- Press cashew half on top while still warm
- Apply silver leaf if using (optional)
- Let cool completely (1-2 hours)
- Store in airtight container
💡 Pro Tips for Perfect Besan Ladoos:
✅ Patience is key: Don’t rush the roasting – undercooked besan tastes raw
✅ Arm workout: Yes, 20 minutes of stirring is tiring, but there’s no shortcut
✅ Temperature matters: Cool besan before adding sugar (hot = melting = greasy ladoos)
✅ Fresh besan: Old besan has bitter taste – use within 2-3 months of milling
✅ Ghee quality: Pure cow ghee gives authentic taste and aroma
✅ Storage: Lasts 2-3 weeks in airtight container at room temperature, 1 month refrigerated
🍽️ Serving Suggestions:
- Diwali sweet box essential
- Festival prasad
- Gift box favorite
- Tea-time snack
- Post-meal dessert
Recipe 2: Gajar Ka Halwa (Carrot Halwa) 🥕
The winter classic that warms hearts and homes!
⏱️ Time:
- Prep: 15 minutes
- Cooking: 45-50 minutes
- Total: 1 hour 5 minutes
- Serves: 6-8
📊 Nutritional Information (per serving):
- Calories: 284 kcal
- Protein: 5.8g
- Carbohydrates: 38.2g
- Fat: 12.5g
- Vitamin A: 285% DV
- Calcium: 168mg
🛒 Ingredients:
Main Components:
- 1 kg (6-7 medium) fresh red carrots, peeled and grated
- 1 liter (4 cups) full-fat milk (Milkaza Fresh Milk)
- ⅔ cup (150g) sugar (adjust to sweetness preference)
- ½ cup (120ml) Milkaza Pure Ghee
- 4-5 green cardamom pods, seeds crushed
- Few saffron strands soaked in 2 tablespoons warm milk
Garnishing:
- ¼ cup cashews, chopped
- ¼ cup almonds, sliced
- 2 tablespoons pistachios, sliced
- 2 tablespoons raisins
- Silver leaf (varak) – optional
👨🍳 Step-by-Step Instructions:
Step 1: Prepare Perfect Carrots
- Choose wisely: Red Delhi carrots (not orange) are traditional and sweeter
- Peel and wash thoroughly
- Grate using large holes of box grater
- Pro tip: Freeze grated carrots for 30 minutes, then thaw – they release moisture better during cooking
Step 2: Cook Carrots in Milk
- In heavy-bottomed kadhai, bring milk to boil
- Add grated carrots
- Cook on medium-high heat, stirring occasionally
- Timeline: 25-30 minutes
- Watch for: Milk should be mostly absorbed, carrots should soften and change to deeper red
Step 3: Add Sugar & Continue Cooking
- Once milk is mostly absorbed, add sugar
- Mix well – sugar will release moisture from carrots
- Continue cooking on medium heat
- Stir frequently to prevent sticking
- Timeline: 10-12 minutes
- Target: Mixture should thicken considerably
Step 4: The Ghee Magic
- This is where halwa transforms!
- Add pure ghee in three stages:
- Stage 1: 3 tablespoons – mix and cook for 3-4 minutes
- Stage 2: 3 tablespoons – mix and cook for 3-4 minutes
- Stage 3: Remaining ghee – final cook
The Ghee Integration Process:
- When you add ghee, mixture will become liquid again
- Don’t panic! This is normal
- Keep stirring and cooking
- Gradually, ghee will separate and float on top
- The magical moment: Ghee starts leaving the sides of the pan
- Color: Halwa turns deep reddish-brown
- Texture: Becomes granular, no longer mushy
Step 5: Add Aromatics
- When ghee separates (you’ll see it glistening on top)
- Add crushed cardamom
- Add saffron-milk mixture
- Stir well
- Cook for 2-3 more minutes
Step 6: Prepare Nut Garnish
- In separate small pan, heat 2 tablespoons ghee
- Add cashews, fry until golden (2-3 minutes)
- Add almonds, fry for 1 minute
- Add raisins, fry until they puff (30 seconds)
- Remove from heat
Step 7: Final Assembly
- Add ¾ of fried nuts to halwa
- Reserve rest for topping
- Mix well
- Cook for final 2 minutes
- Remove from heat
Step 8: Serve
- Transfer to serving dish
- Garnish with remaining nuts
- Apply silver leaf if using
- Best served: Warm with a scoop of vanilla ice cream or fresh malai
💡 Pro Tips for Gajar Ka Halwa:
✅ Carrot choice: Red carrots are sweeter and more traditional than orange
✅ Milk matters: Use full-fat fresh milk – low-fat won’t give creamy texture
✅ Ghee patience: Don’t rush the ghee integration – it takes time to separate
✅ Sweetness: Add sugar in stages, taste and adjust
✅ Make ahead: Tastes better the next day! Reheat with splash of milk
✅ Storage: Refrigerated for 4-5 days; freezes well for up to 1 month
Regional Variations:
- Punjabi style: Extra ghee, topped with malai
- Bengali style: Add khoya (mawa) for richness
- Hyderabadi style: Add condensed milk at the end
Recipe 3: Moong Dal Halwa (Yellow Lentil Halwa) 💛
The royal halwa that requires patience but rewards with perfection!
⏱️ Time:
- Soaking: 3-4 hours (or overnight)
- Prep: 20 minutes
- Cooking: 50-60 minutes
- Total: 4+ hours (mostly passive)
- Serves: 8-10
📊 Nutritional Information (per serving):
- Calories: 342 kcal
- Protein: 8.2g
- Carbohydrates: 42.5g
- Fat: 15.8g
- Fiber: 4.2g
- Iron: 15% DV
🛒 Ingredients:
Main Ingredients:
- 1 cup (200g) split yellow moong dal (chilka removed)
- 1 cup (240ml) Milkaza Pure Ghee + extra for serving
- 1 cup (200g) sugar (or to taste)
- 2½ cups (600ml) hot water
- ½ cup (120ml) full-fat milk
- 6-7 green cardamom pods, seeds crushed
For Richness:
- ¼ cup cashews, chopped
- ¼ cup almonds, sliced
- 2 tablespoons raisins
- 10-12 saffron strands soaked in 2 tablespoons warm milk
- ¼ teaspoon nutmeg powder
👨🍳 Step-by-Step Instructions:
Step 1: Soak the Dal
- Wash moong dal thoroughly (2-3 times)
- Soak in plenty of water for 3-4 hours minimum (overnight is ideal)
- Why this matters: Soaked dal grinds better, halwa cooks faster, texture is superior
Step 2: Grind to Perfect Paste
- Drain soaked dal completely
- Critical: Pat dry with kitchen towel (remove excess moisture)
- Add to grinder/mixer
- Add 3-4 tablespoons milk (not water!)
- Grind to smooth paste – consistency of pancake batter
- Texture check: Should be smooth with NO grainy pieces
- Pro tip: Grind in batches for better control
Step 3: Roast Nuts First
- Heat 2 tablespoons ghee in small pan
- Fry cashews and almonds until golden
- Add raisins, fry until they puff
- Remove and set aside
Step 4: The Long Roasting (Patience Required)
- This step makes or breaks the halwa
- Heat remaining ghee in heavy-bottomed kadhai
- Heat should be medium-low (not medium, not low – in between)
- Add the dal paste
- Now begins the journey: 40-50 minutes of continuous stirring
Roasting Stages Timeline:
0-10 minutes:
- Mixture is wet and mushy
- Sticks to pan easily
- Raw lentil smell
- Keep stirring vigorously
10-20 minutes:
- Mixture starts thickening
- Becomes slightly grainy
- Starts releasing from pan edges
- Ghee begins separating (you’ll see it)
20-30 minutes:
- Color changes from pale yellow to golden
- Texture becomes granular like wet sand
- Ghee clearly visible, floating
- Aroma becomes nutty
30-40 minutes:
- Deep golden color
- Almost dry texture
- Ghee completely separated
- Heavenly aroma fills kitchen
40-50 minutes:
- Rich golden-brown color
- Dal looks roasted, granular
- Ghee pools on sides
- Taste test: Should taste roasted, not raw ✓ DONE
Step 5: Add Hot Liquids (Carefully!)
- Warning: This will splatter!
- In separate vessel, heat water and milk together until hot
- Lower the flame under halwa
- Slowly add hot liquid while stirring constantly
- Mixture will bubble vigorously – keep stirring
- Cook until liquid is absorbed (5-7 minutes)
Step 6: Add Sugar & Finish
- Add sugar, mix well
- Sugar will melt and mixture will become liquid again
- Continue cooking, stirring constantly
- Timeline: 10-12 minutes
- Target consistency: Halwa should leave sides of pan, ghee separates again
Step 7: Final Touches
- Add crushed cardamom and nutmeg
- Add saffron-milk mixture
- Add ¾ of roasted nuts
- Mix thoroughly
- Cook for 2-3 more minutes
- Remove from heat
Step 8: Serve Hot
- Transfer to serving dish
- Garnish with remaining nuts
- Crucial: Serve immediately while hot
- Drizzle extra ghee on top just before serving
- Moong dal halwa is best enjoyed hot
💡 Pro Tips for Moong Dal Halwa:
✅ The dal quality: Use fresh moong dal; old dal takes longer to cook
✅ Grinding texture: Must be perfectly smooth – grainy paste = grainy halwa
✅ Arm workout #2: 40-50 minutes of stirring is non-negotiable
✅ Ghee temperature: Medium-low heat – high heat will burn, low heat won’t roast properly
✅ Hot liquids only: Cold water will splatter more and take longer to cook
✅ Serve fresh: This halwa doesn’t store as well as others – best within 24 hours
✅ Reheating: Add splash of milk and ghee, heat slowly
Why This Halwa is Special:
- Traditional Rajasthani and Punjabi wedding sweet
- Winter festival favorite
- Considered royal and luxurious
- Requires skill and patience – marks of good cook
Recipe 4: Kaju Katli (Cashew Barfi) 🔶
The diamond-shaped delight that’s the star of every mithai box!
⏱️ Time:
- Prep: 15 minutes
- Cooking: 20 minutes
- Setting: 1-2 hours
- Total: 2 hours 30 minutes
- Makes: 24-28 pieces
📊 Nutritional Information (per piece):
- Calories: 87 kcal
- Protein: 2.1g
- Carbohydrates: 9.8g
- Fat: 4.6g
- Magnesium: 8% DV
🛒 Ingredients:
Main Ingredients:
- 2 cups (300g) raw cashews (whole, not pieces)
- 1 cup (200g) sugar
- ½ cup (120ml) water
- 2 tablespoons Milkaza Pure Ghee + extra for greasing
- ½ teaspoon cardamom powder
- Few saffron strands (optional)
For Finishing:
- Silver leaf (varak) – optional but traditional
- Additional ghee for greasing
👨🍳 Step-by-Step Instructions:
Step 1: Prepare Cashew Powder
- Quality check: Use fresh, whole, raw cashews (not roasted, not salted)
- Spread cashews on plate, pick out any discolored pieces
- Grind in mixer/food processor in short pulses
- Target texture: Fine powder like cornstarch
- Critical: Don’t over-grind (oil will release and make lumps)
- Sift through fine sieve
- Re-grind any coarse pieces
- You should get about 2 cups fine powder
Step 2: Make Perfect Sugar Syrup (This is KEY)
- Take heavy-bottomed pan or kadhai
- Add sugar and water
- Heat on medium, stirring until sugar dissolves completely
- Once dissolved, stop stirring (stirring causes crystallization)
- Let it boil
The Critical Consistency Test:
- Cook for 7-10 minutes from boiling point
- Target: One-string consistency
- How to test: Take small amount on spoon, cool slightly, touch with finger and pull apart
- One string should form between finger and spoon
- Too thick: Barfi will be hard
- Too thin: Won’t set properly
- Perfect: One clear string forms
Step 3: Add Cashew Powder
- Once syrup reaches one-string consistency, remove from heat
- Immediately add cashew powder
- Add cardamom powder
- Add 2 tablespoons ghee
- Mix quickly but thoroughly – lumps are enemy here
Step 4: Cook the Mixture
- Return pan to low heat
- Stir continuously using flat spatula
- Timeline: 3-5 minutes
- Watch for: Mixture starts leaving sides of pan
- Test: Take small amount on greased plate – should hold shape and not stick too much
- Remove from heat immediately (overcooking = hard barfi)
Step 5: Prepare for Setting
- While mixture is cooking, prepare work surface:
- Take flat plate, tray, or marble slab
- Grease generously with ghee
- Place greased parchment paper (makes removal easier)
- Grease paper again
Step 6: Roll and Set
- Work quickly: Mixture sets fast!
- Transfer hot mixture to greased surface
- Let cool for 1-2 minutes (should be touchable but still warm)
- Grease your palms with ghee
- Flatten the mixture with hands
- Place parchment paper on top, grease it
- Use rolling pin to roll to ¼-inch thickness
- Goal: Even thickness throughout
- Edges should be smooth (trim if needed)
Step 7: Apply Silver Leaf (Optional)
- While still slightly warm, apply varak (silver leaf)
- Gently press so it adheres
- Trim excess
Step 8: Cut into Shapes
- Let cool completely (1-2 hours) but not fully hard
- Traditional diamond shape:
- Cut straight lines lengthwise (1-inch apart)
- Cut diagonal lines to create diamonds
- Alternative: Cut into squares or rectangles
- Let pieces set completely before separating
💡 Pro Tips for Perfect Kaju Katli:
✅ Cashew quality is everything: Fresh cashews = smooth barfi; old cashews = grainy texture
✅ Fine powder crucial: Coarse = grainy kaju katli (texture flaw)
✅ Sugar syrup precision: Practice the one-string test – it determines success
✅ Speed matters: From adding cashews to rolling out – work fast!
✅ Greased hands: Re-grease hands frequently when working with mixture
✅ Storage: Airtight container, room temperature, lasts 7-10 days; refrigerated 2-3 weeks
✅ Texture fix: Too hard? Next time, cook syrup less; Too soft? Cook syrup longer
Troubleshooting:
- Grainy texture: Cashew powder wasn’t fine enough
- Won’t set: Sugar syrup undercooked
- Too hard: Sugar syrup overcooked
- Cracks when cutting: Let it cool more before cutting
Recipe 5: Sooji Halwa (Semolina Halwa) 🟠
The quick prasad favorite that saves the day!
⏱️ Time:
- Prep: 5 minutes
- Cooking: 15 minutes
- Total: 20 minutes
- Serves: 6
📊 Nutritional Information (per serving):
- Calories: 286 kcal
- Protein: 4.2g
- Carbohydrates: 38.5g
- Fat: 12.8g
- Iron: 8% DV
🛒 Ingredients:
Main Ingredients:
- 1 cup (180g) sooji/rava (fine semolina)
- ½ cup (120ml) Milkaza Pure Ghee
- 1 cup (200g) sugar
- 3 cups (720ml) water
- 6 green cardamom pods, crushed
- Pinch of saffron
Garnishing:
- 2 tablespoons cashews, chopped
- 2 tablespoons almonds, sliced
- 2 tablespoons raisins
- 1 tablespoon charoli (optional)
👨🍳 Step-by-Step Instructions:
Step 1: Roast Nuts
- Heat 1 tablespoon ghee in pan
- Fry cashews, almonds until golden
- Add raisins, fry until they puff
- Remove and set aside
Step 2: Roast Sooji (The Foundation)
- Heat remaining ghee in heavy kadhai/pan
- Add sooji
- Stir continuously on medium-low heat
- Timeline: 8-10 minutes
- Color progression: White → cream → light golden
- Aroma: Nutty, toasted smell (not burnt!)
- Texture: Sooji will become loose and grainy
- Doneness: Light golden color, heavenly aroma
Step 3: Prepare Sugar Water
- While sooji is roasting, boil water separately
- Add sugar to boiling water, dissolve completely
- Add cardamom and saffron
- Keep hot (don’t let it cool)
Step 4: Add Hot Liquid (Carefully!)
- Once sooji is perfectly roasted, reduce heat to low
- Warning: Next step will bubble and splatter!
- Slowly pour hot sugar water while stirring continuously
- Safety: Use long-handled spoon, pour from side
- Mixture will bubble vigorously – keep stirring
- No lumps should form (if they do, stir vigorously to break them)
Step 5: Cook Until Perfect
- Keep stirring on medium-low heat
- Timeline: 4-5 minutes
- Watch for:
- Halwa thickens
- Ghee starts separating (key indicator)
- Leaves sides of pan
- No raw taste when tasted
Step 6: Add Nuts & Finish
- Add ¾ of roasted nuts
- Mix well
- Cook for 1 more minute
- Remove from heat
Step 7: Serve Hot
- Transfer to serving dish
- Garnish with remaining nuts
- Must serve hot – sooji halwa hardens when cold
- Can drizzle extra ghee on top
💡 Pro Tips for Sooji Halwa:
✅ Quick prasad: Ready in 20 minutes – perfect for sudden occasions
✅ Hot water is key: Cold water = lumpy halwa (always use hot!)
✅ Don’t over-roast: Burnt sooji ruins everything – stop at light golden
✅ Proportions: 1:1:3 ratio (sooji:ghee:water) – memorize this!
✅ Variations: Use milk instead of water for richer version
✅ Storage: Best fresh; refrigerate if needed, reheat with milk/ghee
Variations:
- Kesari Bhath: Add orange food color, extra saffron
- Pineapple Halwa: Add crushed pineapple with sugar water
- Coconut Halwa: Add fresh grated coconut while cooking
Ghee Roasting: The Foundation Technique
This technique applies to most Indian sweets. Master it once, use it forever.
The Science of Roasting:
What happens during roasting:
- Maillard Reaction: Creates brown color and nutty flavors
- Caramelization: Natural sugars develop deeper taste
- Moisture Evaporation: Removes raw taste
- Fat Coating: Ghee coats each particle, enhancing texture
Temperature Zones:
Low (150-180°F):
- Light, gentle roasting
- Best for: Delicate nuts, sooji
Medium (180-220°F):
- Standard roasting temperature
- Best for: Besan, atta, dal paste
High (220-250°F):
- Deep roasting
- Best for: Initial stages only
The Visual & Sensory Guide:
Stage 1 – Raw:
- Color: Pale/original color
- Smell: Raw ingredient smell
- Texture: Dense, clumpy
- Taste: Raw, unpleasant
- Action: Keep roasting
Stage 2 – Developing:
- Color: Starting to change
- Smell: Nutty notes emerging
- Texture: Loosening up
- Taste: Still slightly raw
- Action: Continue, patience
Stage 3 – Almost There:
- Color: Light golden/tan
- Smell: Strong nutty aroma
- Texture: Grainy, separating from ghee
- Taste: Mostly cooked
- Action: Close monitoring needed
Stage 4 – Perfect:
- Color: Rich golden brown
- Smell: Deep, roasted, heavenly
- Texture: Ghee separates clearly
- Taste: No raw taste, nutty flavor
- Action: Remove from heat immediately
Stage 5 – Overdone:
- Color: Dark brown
- Smell: Burnt
- Texture: Dry, crumbly
- Taste: Bitter
- Action: Start over (no saving this)
Troubleshooting Common Sweet-Making Issues
Problem 1: Ladoos Won’t Hold Shape
Causes:
- Not enough ghee
- Sugar added when besan too hot (melted sugar makes them crumbly)
- Besan undercooked
Solutions: ✅ Add 2-3 tablespoons more melted ghee, mix well
✅ Let besan cool to warm (not hot) before adding sugar
✅ Ensure besan is roasted to rich golden brown
Problem 2: Halwa is Too Oily
Causes:
- Too much ghee added
- Halwa undercooked (ghee doesn’t integrate)
Solutions: ✅ Cook longer until ghee separates and can be drained
✅ Next time, reduce ghee by 2-3 tablespoons
✅ Add 2-3 tablespoons besan/atta powder, mix and cook
Problem 3: Barfi is Too Hard
Causes:
- Sugar syrup overcooked (more than one-string)
- Mixture cooked too long after adding nut powder
Solutions: ✅ No fix for finished barfi (lesson for next time)
✅ Store with apple slice in container (moisture helps soften)
✅ Next batch: Cook syrup less, work faster
Problem 4: Sweets Taste Raw
Causes:
- Insufficient roasting of flour/dal
- Rushed the cooking process
Solutions: ✅ Return to pan, add 2 tablespoons ghee, roast more
✅ For halwa: Add hot milk/water, cook until absorbed
✅ Next time: Roast until deep golden, don’t rush
Problem 5: Grainy Texture in Kaju Katli
Causes:
- Cashew powder not fine enough
- Old cashews used
- Over-grinding released oils (made lumps)
Solutions: ✅ Next time: Grind in short pulses, sift well
✅ Use fresh cashews always
✅ If grainy batch: Grind again, add to new sugar syrup
Storing Ghee-Based Sweets
📦 General Storage Guidelines:
Room Temperature:
- Best for: Most ladoos, barfis
- Duration: 7-10 days
- Container: Airtight tin or container
- Note: Ghee acts as preservative
Refrigerated:
- Best for: Halwas, milk-based sweets
- Duration: 2-3 weeks
- Container: Airtight container
- Reheating: Add splash of milk/ghee, microwave 30 seconds
Frozen:
- Best for: Ladoos, some barfis
- Duration: 1-2 months
- Thawing: Room temperature for 2-3 hours
- Note: Texture may change slightly
Sweet-Specific Storage:
Besan Ladoo: Room temp, 2 weeks; refrigerated, 1 month
Gajar Halwa: Refrigerated, 4-5 days; frozen, 1 month
Moong Dal Halwa: Refrigerated, 2-3 days (best fresh)
Kaju Katli: Room temp, 7-10 days; refrigerated, 2-3 weeks
Sooji Halwa: Refrigerated, 2-3 days (best fresh)
💡 Storage Pro Tips:
✅ Layer separation: Place parchment between layers of barfi/katli
✅ Avoid moisture: Never store near sink or in humid areas
✅ Temperature shock: Let refrigerated sweets come to room temp before serving
✅ Freezer friendly: Wrap individual portions for easy serving
✅ Quality ghee: Pure ghee preserves better than adulterated
Regional Variations in Ghee Usage
Different regions of India have unique approaches to using ghee in sweets:
🔶 North India (Punjab, Haryana, UP)
- Generous ghee use: More is more!
- Signature sweets: Pinni, moong dal halwa, gajar halwa
- Style: Rich, heavy, winter-focused
- Ghee finish: Extra ghee drizzled on top before serving
🟡 West India (Gujarat, Rajasthan)
- Refined use: Balanced, not excessive
- Signature sweets: Mohanthal, lapsi, ghevar
- Style: Intricate techniques, festive focused
- Ghee quality: Premium ghee for premium sweets
🟠 South India (Tamil Nadu, Karnataka, Kerala)
- Moderate use: More coconut, less ghee
- Signature sweets: Mysore pak, kesari bath, payasam
- Style: Coconut-ghee combinations
- Ghee role: More for aroma than quantity
🟢 East India (West Bengal, Odisha)
- Milk-centric: Less ghee, more milk/khoya
- Signature sweets: Pantua, chhena poda, rasagulla (no ghee)
- Style: Syrup-based, lighter
- Ghee role: Supporting actor, not lead
🔴 Central India (MP, Chhattisgarh)
- Traditional approach: Follows North Indian style
- Signature sweets: Mawa bati, imarti (fried in ghee)
- Style: Festival and ritual focused
- Ghee source: Often home-made bilona ghee
Why Choose Milkaza Ghee for Your Sweets?
At Milkaza, we understand that authentic Indian sweets demand authentic ghee. Here’s why our ghee is perfect for your traditional sweet making:
🐄 Pure & Authentic:
- Made from farm-fresh milk
- No additives or preservatives
- Traditional taste and aroma
- FSSAI certified quality
🎯 Multiple Options:
- Pure Cow Ghee – Light, aromatic, perfect for delicate sweets
- Desi Ghee – Rich, traditional, ideal for halwas
- Gawa Ghee – Premium quality for special occasions
📦 Convenient Packaging:
- Multiple sizes: 50g to 5kg
- Hygienic, sealed containers
- Easy-pour bottles for larger sizes
🚚 Fresh Delivery:
- Daily delivery across Kolkata
- Fast doorstep service
- Subscription options available
💰 Fair Pricing:
- Premium quality at reasonable prices
- Bulk discounts available
- No compromise on authenticity
Order Fresh Ghee Today:
📞 Call: +91 8981818740
🌐 Visit: milkaza.com/products
Complete Your Sweet-Making Kit:
- Fresh Full Cream Milk – For milk-based sweets
- Classic Dahi – For mishti doi
- Fresh Paneer – For sandesh and rasgulla
Learn more about our dairy products:
Frequently Asked Questions (FAQs)
Q1: Can I substitute oil for ghee in Indian sweets?
A: While technically possible, oil cannot replicate ghee’s authentic taste, aroma, and texture. Oil-based sweets lack the characteristic flavor, have shorter shelf life, and different mouthfeel. For authentic Indian desserts, pure ghee is non-negotiable.
Q2: How much ghee should I use in ladoos?
A: General ratio is 1:2 to 1:3 (ghee to flour). For 2 cups flour, use ¾ to 1 cup ghee. Too little = dry, crumbly ladoos; too much = greasy ladoos. Adjust based on flour’s oil content and roasting level.
Q3: Why does my halwa separate and become oily?
A: Usually means halwa is undercooked. Keep cooking and stirring until ghee integrates and then separates cleanly (you can see clear ghee on top, not mixed in). This can take 10-15 minutes longer than you think. Patience is key!
Q4: Can I use butter instead of ghee for Indian sweets?
A: Not recommended. Butter contains 15-20% water which affects texture and cooking. It also burns at lower temperatures, has different flavor, and doesn’t preserve sweets as well. Ghee’s high smoke point and pure fat composition are crucial for traditional sweets.
Q5: What’s the difference between cow ghee and buffalo ghee for sweets?
A: Cow ghee is lighter, more aromatic, golden-yellow, and better for delicate sweets like ladoos and barfis. Buffalo ghee is richer, whiter, and preferred for heavy halwas in some regions. Both work; choice depends on preference and regional tradition. Learn more: Cow Ghee vs Desi Ghee.
Q6: How do I know if my ghee is pure or adulterated?
A: Tests: (1) Refrigerate – pure ghee solidifies uniformly, adulterated separates; (2) Melt a spoon – pure ghee melts evenly with pleasant aroma; (3) Palm test – pure melts quickly without greasy residue. Buy from trusted sources like Milkaza to ensure purity.
Q7: Why do my ladoos become hard after a day?
A: Common causes: (1) Too much sugar, (2) Not enough ghee, (3) Mixture was too hot when shaped. Solution: Store in airtight container with a piece of apple (adds moisture). Prevention: Ensure proper ghee ratio and cool mixture to warm before shaping.
Q8: Can I reduce ghee in recipes for health reasons?
A: Yes, moderately. You can reduce by 10-15% without major impact on taste/texture. Beyond that, the sweet’s character changes significantly. Remember: Indian sweets are indulgences meant for occasional consumption, not daily. Better to make them authentically and eat smaller portions.
Q9: How long does ghee last, and how should I store it?
A: Pure ghee lasts 6-12 months at room temperature in airtight container, away from heat/light. Refrigeration extends life to 12-18 months. No need to refrigerate if using within 3-4 months. Milkaza ghee comes in various sizes to match your usage.
Q10: What’s the best ghee for making sweets at home?
A: For most home cooking, pure cow ghee like Milkaza’s Cow Ghee is ideal – it has authentic flavor, good aroma, and works for all sweet types. For special occasions or rich halwas, premium A2 or bilona ghee offers superior taste. Avoid commercial blends.
Q11: Why does my kaju katli turn grainy instead of smooth?
A: Three main reasons: (1) Cashew powder wasn’t fine enough – must be like cornstarch; (2) Old cashews used (fresh are crucial); (3) Sugar syrup consistency wrong. Always grind cashews to ultra-fine powder, use fresh nuts, and perfect the one-string syrup consistency.
Q12: Can I make sweets with ghee if I’m lactose intolerant?
A: Yes! Pure ghee has trace amounts of lactose (less than 0.5%) – most lactose-intolerant individuals tolerate it well. The clarification process removes milk solids containing lactose. However, if you have severe dairy allergy, consult your doctor before consuming.
Q13: How do I fix sweets that turned out too oily?
A: For halwas: Cook longer until excess ghee separates, then drain it off (save for cooking). For ladoos: Add 2-3 tablespoons roasted flour, mix well, reshape. For barfis: Unfortunately, no fix – lesson for next batch (use less ghee, cook mixture longer).
Q14: Why do recipes call for so much ghee? Can I reduce it?
A: Traditional recipes use generous ghee for: (1) Authentic taste, (2) Preservation (ghee is natural preservative), (3) Texture, (4) Cultural/ritual significance. Modern recipes already reduce amounts. You can trim another 10-15% max without compromising quality. Beyond that, you’re making a different sweet.
Q15: Where can I buy pure, authentic ghee in Kolkata for sweet-making?
A: Milkaza delivers fresh, quality-tested, pure ghee across Kolkata. Choose from Cow Ghee, Desi Ghee, or Gawa Ghee. Order online or call +91 8981818740 for same-day/next-day delivery.
Conclusion: Mastering the Golden Art
The art of using ghee in Indian sweets is a beautiful blend of science, tradition, and intuition. From the patient roasting of besan for ladoos to the careful tempering in moong dal halwa, from the precision of kaju katli’s sugar syrup to the quick assembly of sooji halwa – each sweet has its own personality, its own demands, and its own rewards.
What makes Indian desserts truly special isn’t just the recipes – it’s the love, patience, and quality ingredients that go into them. Pure ghee is the heart of this tradition, the golden thread that connects generations, the aroma that brings back childhood memories, and the taste that makes every celebration special.
Now you have the knowledge, techniques, and recipes to create authentic traditional sweets in your own kitchen. Start with one recipe, master it, then move to the next. Soon, your home will fill with the same aromas that have graced Indian kitchens for thousands of years.
Remember: Great sweets start with great ghee. Choose wisely, cook patiently, and serve with love.
Ready to Create Sweet Magic?
👉 Order Pure Ghee – Farm-fresh, delivered daily
👉 Explore All Dairy Products – Milk, dahi, paneer, ghee
👉 Read More Recipes – Traditional Indian cooking guides
👉 Contact Us – For bulk orders and queries
📞 Call Now: +91 8981818740
🌐 Visit: milkaza.com
✉️ Email: milkazaindia@gmail.com
Your Complete Sweet-Making Pantry from Milkaza:
- Pure Cow Ghee – For authentic flavor
- Desi Ghee – For rich halwas
- Full Cream Milk – For milk-based sweets
- Classic Dahi – For mishti doi
- Fresh Paneer – For Bengali sweets
Related Articles for Sweet Lovers:
- Probiotics in Dahi: Boost Your Gut Health Naturally
- Rich Malai Milk: The Secret to Creamy Chai and Traditional Recipes
- Cow Ghee vs Desi Ghee: What’s the Difference?
- 5 Easy Raita Recipes Using Fresh Milkaza Dahi
- Understanding Different Milk Variants
📸 Share Your Sweet Creations!
Made any of these recipes? Tag @MilkazaIndia on social media – we’d love to feature your mithai magic!
💌 Subscribe to Milkaza’s Heritage Recipe Newsletter:
Get authentic Indian recipes, cooking tips, festival special recipes, and exclusive offers. Plus, download our free “Traditional Bengali Sweets” eBook!
About Milkaza:
Milkaza is Kolkata’s most trusted name for premium dairy products. Since [year], we’ve been delivering farm-fresh milk, authentic ghee, probiotic-rich dahi, and quality paneer to thousands of homes across the city. We believe in preserving culinary heritage while maintaining modern hygiene standards. Every product undergoes rigorous quality testing because your family’s health and your recipes’ authenticity matter to us. From our farm to your festive table – that’s the Milkaza promise.